
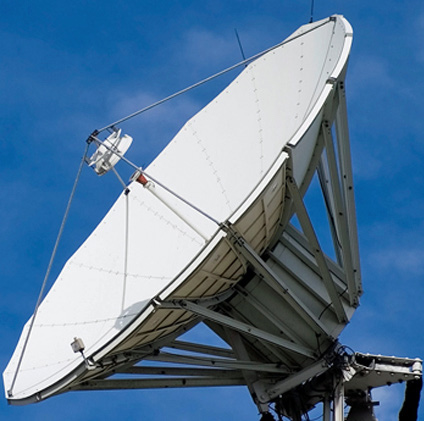
Although a satellite’s footprint covers a large area, it is imperative that your satellite terminal be aligned in the exact direction of the satellite to ensure a precise transmit path and to maximize signal strength for the receiver. If the terminal is slightly out of position, signal strength could be reduced, causing the received signal to be unusable. In addition, an improperly aligned terminal could affect adjacent satellites, as the transmitted signal could interfere with their operation. This interference could potentially cause issues with your satellite service provider and you may be prevented from operating your terminal.
To guarantee precise alignment while maintaining good terms with your service provider, it is imperative that a technician possess the proper satellite alignment tools in their toolkit. Although this is not an extensive kit list, here are some of the more frequently used tools:
– GPS
– Satellite Angle Calculator
– Current Satellite Almanac
– Level
– Compass
– Inclinometer
– Signal/Power Meter
– Spectrum Analyzer
– DVB Receiver
– Modem
Aligning and pointing a satellite terminal is a relatively straightforward procedure. However, if a technician doesn’t have the basic tools available for use, this simple task could become difficult and quite time consuming. A technician must have the appropriate physical tools as well as the ability to follow accepted, standardized methodology for satellite acquisition
Methodology
1. Determine your location
2. Determine the location of the desired satellite
3. Calculate the azimuth and look angle and polarization
4. Level your terminal
5. Point your terminal at the satellite
6. Fine tune adjustments of your terminal
The first step in terminal alignment is determining where to point the dish. To calculate the azimuth and inclination angles, you will need to know the terminal’s location relative to the satellite’s location. Although you could use a map and calculate the latitude and longitude of the terminal’s current position, a GPS is far more accurate and relatively inexpensive to purchase. There are many free, online, mapping tools on the Internet that you can use as an alternative to using a GPS. For example, Google Maps gives you an accurate location by drilling down and clicking on your location through their interactive GUI.
The next step will be to calculate the pointing angles. A satellite angle calculator is basically a reference source that will provide the proper compass heading, azimuth, elevation and look angle for the terminal, relative to the terminal’s ground position and the particular satellite. This tool is quite easy to use (and usually free)—one only needs to input the terminal’s latitude and longitude along with the satellite that you are trying to lock onto. Websites such as www.dishpointer.com, or an iPhone app such as Norsat’s Satellite Locator, are some examples of available tools. If you do not have access to these types of on-line tools, a satellite almanac is required—this is a reference source that gives you the location of each satellite.
Now you are ready to point your terminal.
The first physical tool you should use is a level to ensure that your terminal base is as level as possible. This is extremely critical for assisted acquire terminals as many auto acquire terminals have a leveling feature. Leveling will safeguard you from missing the satellite as the dish is rotated.
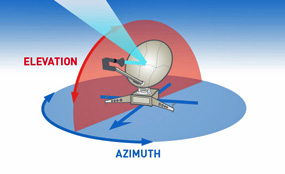
As previously stated, the look angle is the angle between the ground plane of the terminal and the satellite itself. This measurement can be done using a simple compass ruler and plumb line, or a mechanical inclinometer such as is displayed in the figure below. These tools would be attached to your terminal and you would directly read off the angle. Additionally, depending on your system, your terminal could have an integrated electronic inclinometer that works with the system’s GUI. One caveat of measuring the elevation is that you must account for any offsets of the feed horn from the center axis and either add or subtract the difference, accordingly.
Measuring the azimuth is another relatively straightforward calculation that is accomplished by using a compass. There are many types of compasses and it doesn’t really matter if you use a traditional floating needle compass or a digital compass. However, you must account for the magnetic declination when taking a compass bearing. The magnetic declination is the difference between true north and magnetic north.
The satellite calculator, compass and inclinometer are standard tools to use to get your terminal aligned and pointed in the general direction of the satellite. Once pointed, you then need to fine-tune these measurements to actually acquire the satellite. The following will help you accomplish this task.
Signal Meters or Power detectors are quite inexpensive. These tools will measure the relative power of a satellite signal and give you an indication of whether your terminal is pointing to a satellite. Unfortunately, a disadvantage of a signal meter is that they cannot tell you which satellite you are targeting. However, if you know the location of a reference satellite, you should be able to rotate the dish along the orbit, counting the satellites that you have detected until you reach the desired satellite.
Spectrum analyzers are a step up from signal detectors. Similar to signal meters, spectrum analyzers will indicate that you are on a satellite and you can adjust your terminal to that signal. However, just like a signal meter, a spectrum analyzer will not tell you which satellite you are on. However, each satellite does have a particular signature and, unlike a signal detector, you can view these signatures with a spectrum analyzer.
Over time, a technician can build up their library of spectrum views and have full confidence that they are on a specific satellite. Another advantage of a spectrum analyzer over a signal detector is that a spectrum analyzer is more sensitive. That is, if there are two satellites close together, you would be able to see the difference. Also, for a narrow band carrier, the spectrum analyzer will see the satellite, where a signal detector will not be able to do so.
Finally, a modem and/or DVB receiver will allow a technician to validate that they have locked on to their desired satellite. A modem will only lock onto a specific satellite signal when the technician has aligned and peaked the terminal. The same is true with the DVB receiver—it will decode and allow a technician to view the transmission from the satellite, but again, only if the terminal has been properly aligned. If the technician knows what is being transmitted and can view it or lock onto the signal, they have just confirmed they are on the correct satellite; however, a spectrum analyzer or a signal meter should be used as well to guarantee they are receiving the best max signal possible.
In the end, a satellite signal is only as good as the properly tuned terminal—technicians need the correct tools to accomplish this job effectively.
About the author
Sam Fasullo is a Product Manager at Norsat International Inc. for the Company’s Satellite division. He has more than 12 years of communications experience.
About Norsat International
Norsat International is a market leader in communications solutions. Norsat’s technologies enable the transmission of data, audio and video for remote and challenging applications. Included in Norsat’s product offering is the SAA (Satellite Acquisition Assistant) toolkit that provides an all-in-one convenient, cost effective solution for quick, simple and accurate satellite acquisition. For more information about Norsat’s satellite solutions or SAA toolkit, please contact a Norsat Representative. To learn more about Norsat’s products and applications please visit http://www.norsat.com/solutions/
* * * * * * * * *
Norsat’s Helping Hands
Norsat’s satellite accessories options streamline the process of terminal set up and operation, enhancing the performance of any Norsat satellite terminal.
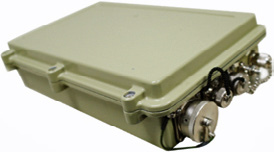
SAA
Norsat’s Satellite Acquisition Assistant (SAA) is a complete satellite acquisition toolkit with everything required to quickly and accurately acquire a satellite lock. The SAA includes:
– Spectrum analyzer
– Integrated GPS, inclinometer, and compass
– Narrow band receiver
– DVB receiver
– Intuitive LinkControl Software Interface
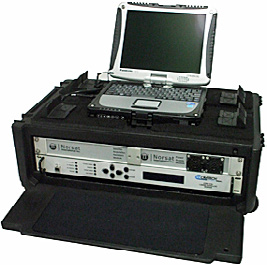
CIDU
Norsat’s Compact Indoor Unit (CIDU) offers an integrated, modular IDU solution, portable enough to travel wherever you need to go— the CIDU includes:
– Power Supply
– SAA module
– System Control
– A variety of modem options